.png)
How to Add an Existing Account to Group Invoices
If you have taken a group reservation at your park, this tutorial will show you how to assign existing Good Sam Booking Campground Booking accounts to the sites that have been selected in the group reservation.
If you haven’t already created the group reservation, you can get started by checking out this article - once the group reservation has been created, make your way back here to find out how to add accounts to the individual invoices.
Why we created this feature: Having the ability to group sites together for parties or events is beneficial for both the guest and the campground owner, however without the ability to track which guest is in which site, when the time of payment comes around it can cause more problems than it solves. The intention of this feature is to allow you to group sites together for parties and/or large groups, while still giving you the ability to split invoices and keep track of which individual guest is in which specific site.
To add an existing guest account onto an individual invoice within a group, start by clicking into the Reservations tab, making sure the group’s reservation dates are included in your date range, and clicking the drop down filter that says “All”.

Scroll down on the drop down filter until you see “Groups” and select it. You’ll then be shown all of the group reservations that are within the given date range at the top of the page - find the group you’re looking for and double click the group to view the individual reservations within.
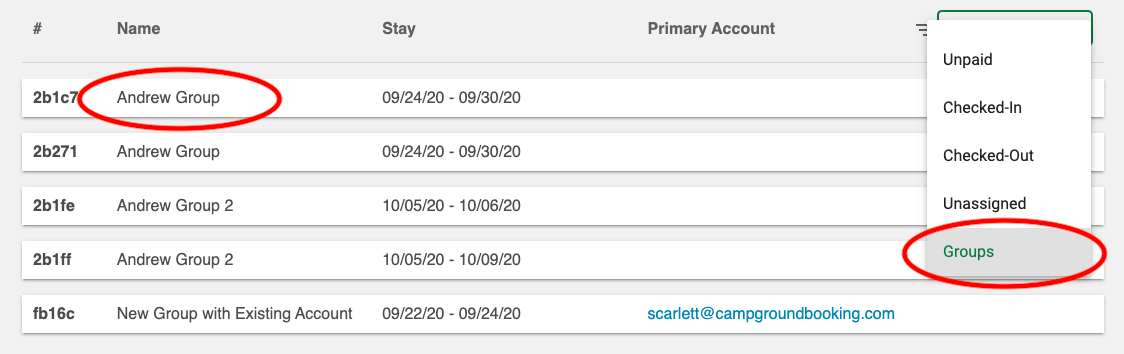
You’ll then choose which site within the group you want to add an existing account to and either double click on it or click the three vertical dots on the right side and select “Edit”.

Once you’ve chosen the individual reservation, find the “Camper Information” tab towards the top of the window and select it.

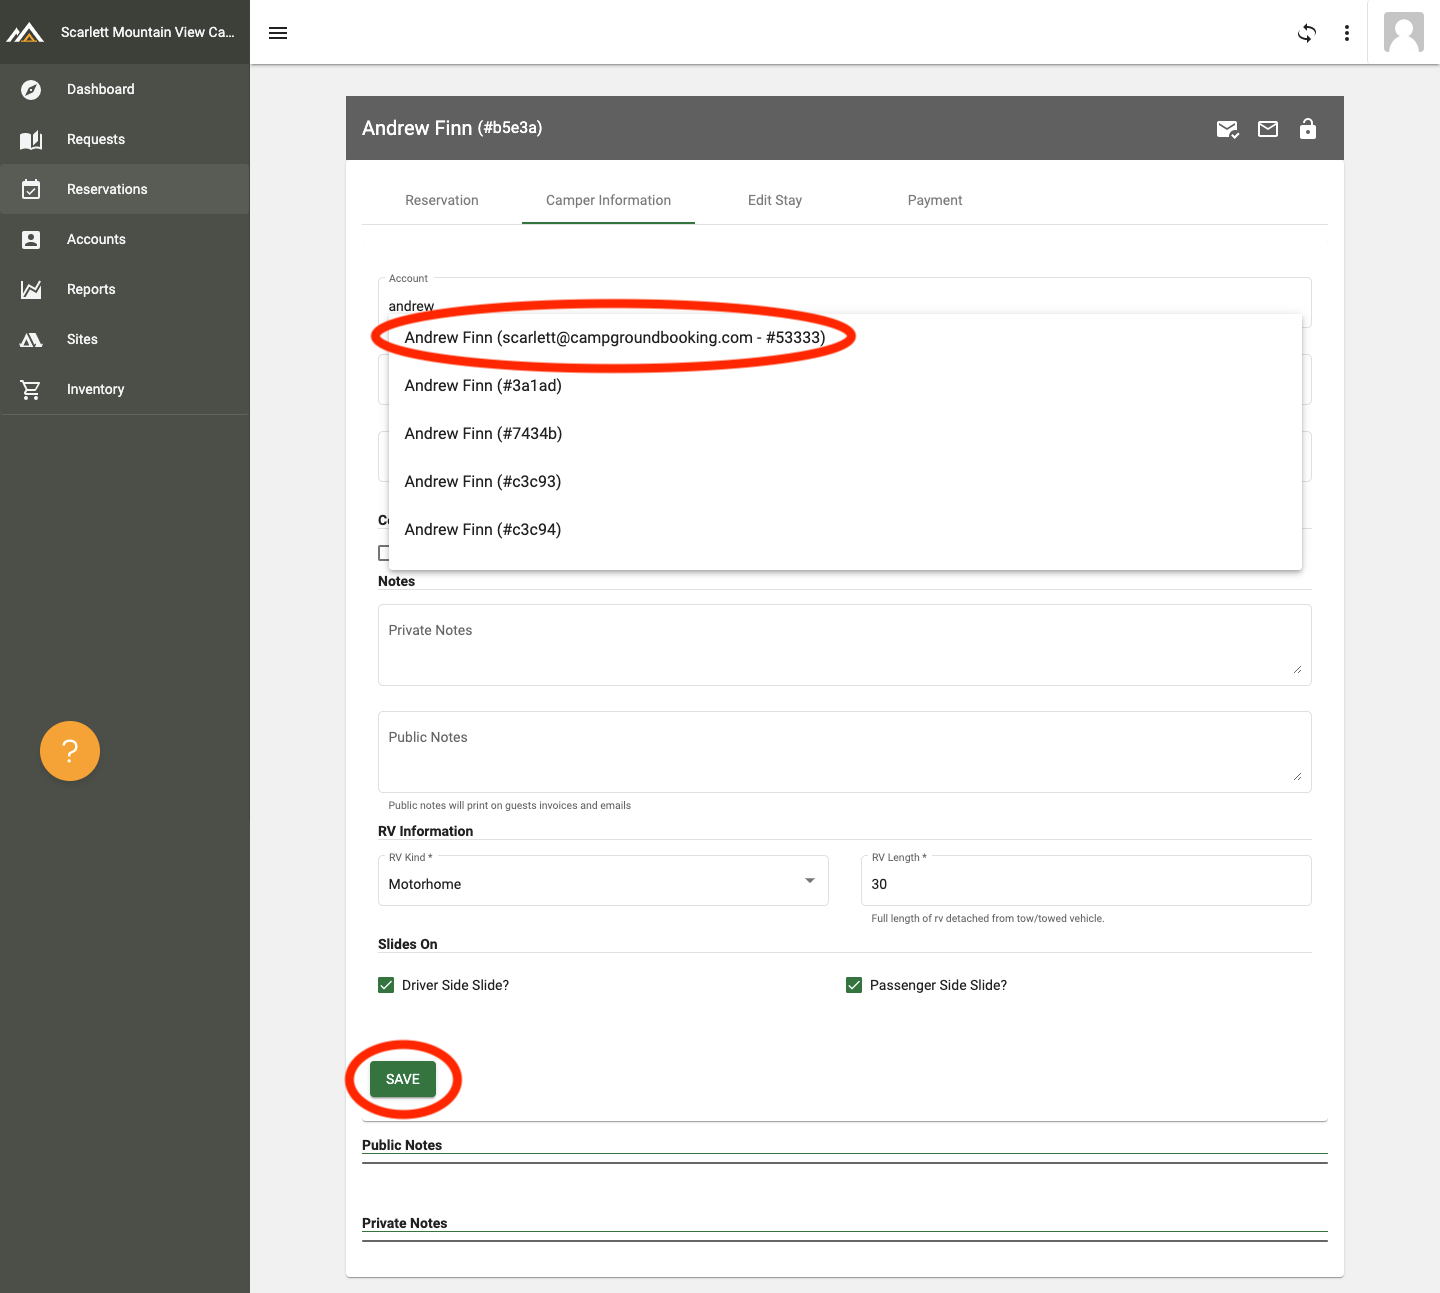
Here you will see an overview of all of the camper information associated with this reservation - as a note, the default information here will be that of the customer which the group reservation was initially created under, once you add in a new guest name this will change.
To add a new account, click the “Account” text box near the top, clear any previous information, enter the name of your desired guest’s account, and select it when it pops up in the drop down menu. Once the account has been added, scroll to the bottom and click “Save”.