.png)
Legacy - How to Add a Discount to a Reservation
Once, you’ve learned how to set up a discount in your settings and create a manual reservation on the dashboard, you’ll be ready to apply those discounts to your guests’ reservations. Discounts can be set for anything you as the owner/manager desires - Military, Senior, Good Sam, etc.
Getting Started: When applying a discount to a reservation, there are two possible places to start - at the invoice/payment stage of a manually created reservation, or by editing an existing reservation and adding the discount on after the reservation's initial creation.
Editing an Existing Reservation:
You’ll start by locating the reservation on the dashboard, hovering over the ”i” on the right side of the reservation, and clicking the pencil icon to edit the reservation.

Once you’ve selected to edit the reservation, you’ll then navigate to the “payment” tab on the right side of the screen. Since this reservation has already been created and its invoice established, you’ll have to select to “Edit” the invoice as well, shown below.

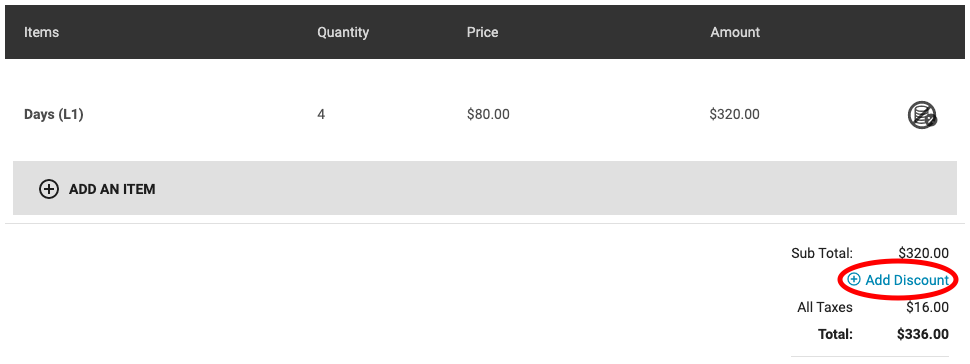
Now that you’ve opened the invoice up for edits, you’ll be able to add inventory items and apply discounts to the invoice. To apply a discount to the reservation, you’ll click the “Add Discount” option indicated below.
To learn how to add inventory items to an invoice, click here.
When you select “Add Discount” a box will appear with a scrollable drop-down menu - search through this menu for the discount you have in mind and select it.
Note: A discount must be active to appear in this drop-down menu. To learn more about how to create a discount and make it active, click here.

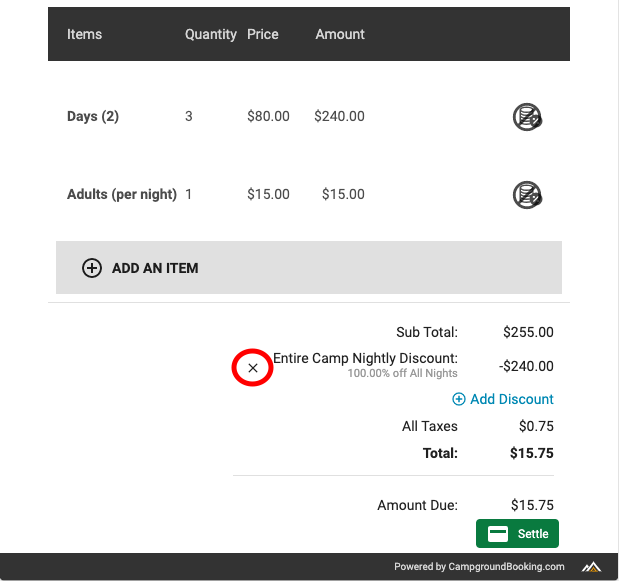
Now that you’ve selected the discount you want applied, the invoice will reflect the adjusted amount - shown below.
Note: To finalize this discount, you must click “Save” at the bottom of the invoice. Neglecting to do this will result in no discount being applied to the invoice.

Now that you have applied your discount, you’re ready to settle your adjusted invoice.
To learn how to settle an invoice, click here.

Adding a Discount at the time of Reservation Creation:
For an in-depth tutorial on how to create a manual reservation, click here.
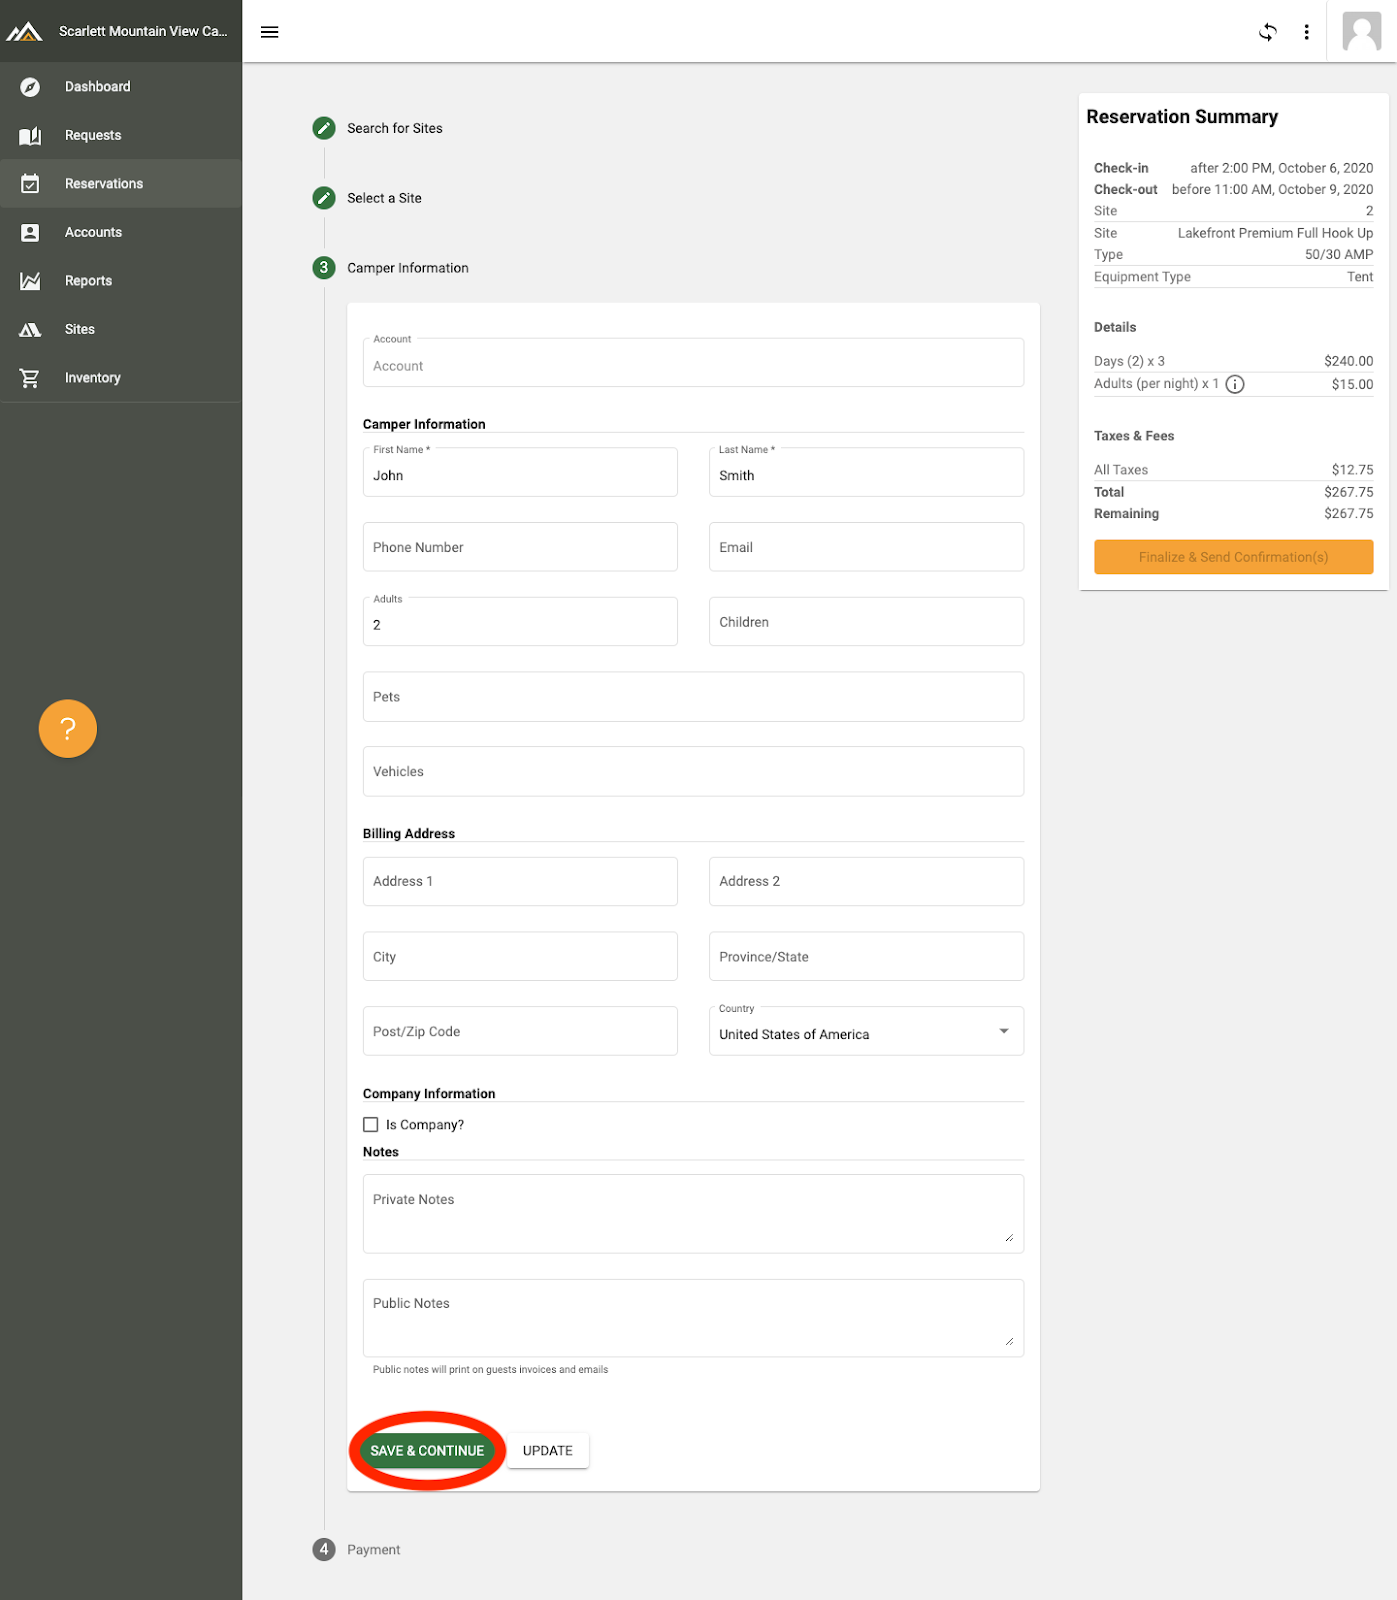
Once you’ve selected the appropriate dates and reservation type, chosen a corresponding site, and entered in the camper information, you’ll navigate to the bottom of the “Camper Information” page and click “Save and Continue” - this will bring you to the “Payment” page.
Now that you’re on the Payment page and looking at the invoice, click the "Add Discount" option indicated below.

After you click the “Add Discount” option, a drop down menu will appear - scroll through the menu to find the appropriate discount for this reservation and select it to apply it to the invoice.
Once selected, the discount will apply to the reservation invoice as shown below. If you accidentally select the wrong discount, simply click the “X” to the left of the discount on the invoice and repeat the discount application process detailed above.
Now that your discount has been applied, you’re able to see the adjusted price and settle the invoice! To learn how to settle an invoice, click here.