.png)
How do I create an account for a new camper?
The Accounts tab is a useful feature when dealing with frequent guests. Accounts can be created manually or automatically when a reservation is made. When a guest books online or makes a reservation through the campground host/manager, they will have an account automatically created for them associated with the first and last name, email address, and phone number given at the time of the reservation. All subsequent reservations using the same information will be logged here. In this article, we will walk through how to manually create a new account for a guest.
Note: If you would like to learn more about the Accounts feature, click here.
Manually creating an account for a guest can be useful as you’re getting started in the system if you already know many of your frequent guests, if a guest wants a group reservation and you would like to add different accounts to the different sites in that group reservation, or if there is a blacklisted guest that hasn’t booked a stay through this system yet.
Note: To learn how to add existing accounts to a group reservation, click here.
Getting Started: First, you will need to navigate to the Accounts tab. This feature will be the fourth tab down on the far left side of the screen - illustrated below.

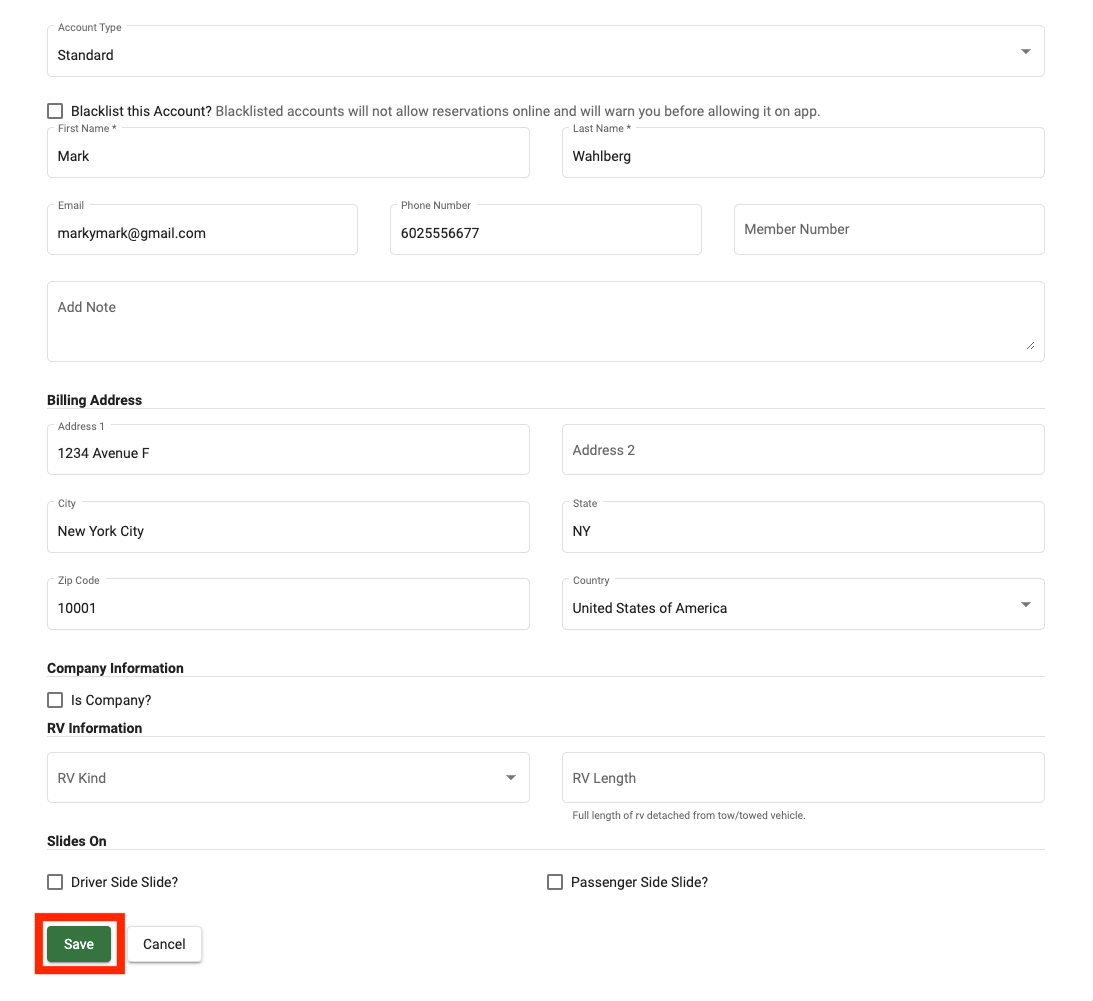
Once you’ve clicked into the Accounts tab, you will see a list of all of your existing accounts. To create a new account, you will want to select the “Add Account” button in the upper right-hand corner - the following screen will appear:

You will want to go down the window entering in all of the applicable information that you have - the more information you’re able to fill out, the less you will have to populate if making a manual reservation for this guest in the future.
Note: At the top of the screen, there’s the “Account Type” drop down menu. For an individual guest, you will select “Standard”; for a group account, you will select “Group”. To learn how to create a group account, click here.
Just below the Account Type drop down menu is the “Blacklist Account” checkbox; if you are creating this account for a guest you wish to blacklist, check this box before finishing the information and clicking save.
Note: If you would like to learn more about blacklisting guests, click here.
Once you have entered the camper’s information you will then hit save at the bottom left of the window. You will not be able to enter in a guest’s RV Information from this initial creation window, to do that you must edit the account information. To learn more about how to edit an account, click here.
Now that you’ve saved the information, the account has been created! You can now make new reservations for this account, add it to group reservations, and see a list of all reservations made with this information moving forward.
What’s Next: